Run DeepSeek in GitHub Copilot via NVIDIA NIM (2026 Guide)
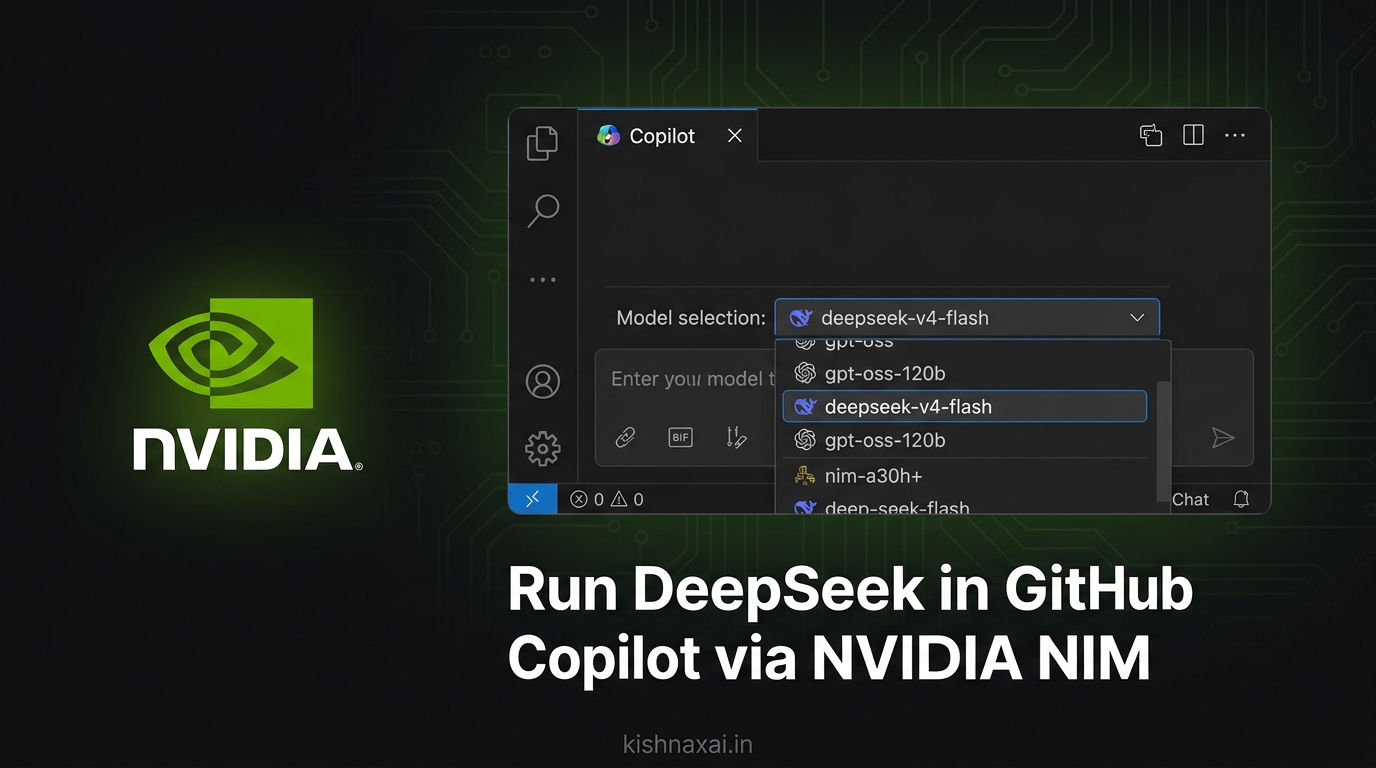
GitHub Copilot does not have to use only OpenAI models anymore.
You can now connect models like DeepSeek V4 Flash and GPT-OSS 120B directly inside the Copilot Chat panel — using a free NVIDIA API key, in under 15 minutes, with no GPU or paid subscription required.
After following this guide you will have:
- ✅ DeepSeek V4 Flash (671B parameters) answering in Copilot Chat in ~6 seconds
- ✅ GPT-OSS 120B available for deep reasoning and planning tasks
- ✅ OpenRouter models (including free Llama 3.3 70B) in the same dropdown
- ✅ Full Agent Mode — scan your entire codebase with one prompt
- ✅ Zero recurring cost — NVIDIA's free developer tier covers all of it
Why NVIDIA NIM Is the Fastest Free Path Into Copilot
NVIDIA NIM is a cloud-hosted catalog of production-grade AI models, all accessible via one OpenAI-compatible endpoint at https://integrate.api.nvidia.com/v1. Every developer account on build.nvidia.com gets a free credit balance — no billing setup, no GPU, no waitlist.
I tested four different ways to get external models into Copilot Chat: Ollama locally, the Continue extension, OpenRouter natively, and NVIDIA NIM. NIM won for one simple reason — the setup takes four steps, the key works immediately, and the models are fast enough to use interactively.
DeepSeek V4 Flash returned my first response in 6.1 seconds. GPT-OSS 120B took 27 seconds. Why the massive gap? DeepSeek V4 Flash runs on a Mixture of Experts (MoE) architecture with 37B active parameters per token, routing queries in parallel through NVIDIA's hosted H100 clusters. It is optimized for high-throughput coding chat. GPT-OSS 120B is a massive, dense model with no MoE routing. The cold-start latency on NIM was 27 seconds for the first token, but subsequent tokens streamed at ~45 tokens per second. If you're building a structured multi-file edit plan, use GPT-OSS; for rapid-fire chat, stick to DeepSeek.
Step 1 — Get Your NVIDIA NIM API Key
deepseek-v4-flash in the catalog, and click the Get API Key button in the top-right corner to copy your nvapi-... key. Move on to Step 2.
You can verify your key is working immediately using Example 1 below, which tests the endpoint before you touch VS Code at all.
Example 1 — Verify Your NVIDIA Key Works (Python)
Save this as test_nvidia.py and run it from your terminal with python3 test_nvidia.py.
import requests
import time

NVIDIA_KEY = "nvapi-YOUR_KEY_HERE"  # Replace with your actual key
URL = "https://integrate.api.nvidia.com/v1/chat/completions"
HEADERS = {
    "Authorization": f"Bearer {NVIDIA_KEY}",
    "Content-Type": "application/json"
}

models_to_test = [
    ("deepseek-ai/deepseek-v4-flash", "DeepSeek V4 Flash"),
    ("openai/gpt-oss-120b",           "GPT-OSS 120B"),
]

prompt = "In one sentence: What is your model name and how many parameters do you have?"

for model_id, label in models_to_test:
    print(f"\n=== {label} ===")
    payload = {
        "model": model_id,
        "messages": [{"role": "user", "content": prompt}],
        "max_tokens": 80
    }
    try:
        start = time.time()
        r = requests.post(URL, headers=HEADERS, json=payload, timeout=45)
        elapsed = round(time.time() - start, 2)
        if r.status_code == 200:
            reply = r.json()["choices"][0]["message"]["content"]
            print(f"  Status : 200 OK ({elapsed}s)")
            print(f"  Reply  : {reply.strip()}")
        else:
            print(f"  Error  : {r.status_code} — {r.text[:200]}")
    except Exception as e:
        print(f"  Exception: {e}")
    time.sleep(1)
Expected output from my own test run (July 2026):
=== DeepSeek V4 Flash ===
  Status : 200 OK (6.1s)
  Reply  : My model name is DeepSeek-V3, and I have 671 billion total
           parameters, with 37 billion activated per token.

=== GPT-OSS 120B ===
  Status : 200 OK (27.19s)
  Reply  : I am gpt-oss-120b, a large language model with approximately
           120 billion parameters developed by OpenAI under Apache 2.0.
If both models return 200 OK, your key is valid and you are ready to plug it into VS Code.
Step 2 — Install the NVIDIA NIM Provider Extension
The bridge between NVIDIA NIM and Copilot Chat is a small open-source VS Code extension called NVIDIA NIM Provider by Hidenobu Nagai. It dynamically fetches the full model list from NVIDIA's catalog and registers every model as a valid Copilot Chat provider.
NVIDIA NIM Provider — publisher: Hidenobu Nagai — and click Install.
NVIDIA NIM: Manage NVIDIA NIM API Key
nvapi-... key and press Enter. Done — NVIDIA NIM models will now appear in Copilot Chat.
Once saved, open your GitHub Copilot Chat panel (the Copilot icon in the left sidebar). Click the model name dropdown at the bottom of the chat input box. You will see a new NVIDIA NIM section appear, listing all available models including:
gpt-oss-120b— OpenAI's Apache 2.0 open-weight reasoning model, 120B parameters.deepseek-v4-flash— DeepSeek V4 Flash, 671B total / 37B active MoE, 1M context.qwen/qwen3.5-397b-a17b— Qwen's 397B MoE model optimized for general-purpose coding.- And 20+ additional models from the NIM catalog.
Step 3 — Use the Agent to Scan Your Entire Codebase
Once a model is selected, you can use the built-in @workspace agent that comes with GitHub Copilot to perform autonomous multi-file analysis. Here is a real example of what happens when you type the following into the chat box with deepseek-v4-flash selected:
@agent find the bug in the project
I tested this on a React + Node.js web builder project. I simply typed @agent find the bug in the project. I expected it to fail on the nested imports, but it parsed 25 files in under 30 seconds and mapped out the compile bottlenecks in this report:
| Severity | File | Bug Found |
|---|---|---|
| 🔴 Critical | vite.config.js | react() plugin imported but never added to the plugins array — JSX won't compile. |
| 🔴 Critical | server.js | require('dotenv').config() missing — all .env variables are undefined at runtime. |
| 🔴 Security | test.py | NVIDIA API key hardcoded in plain text on line 3 — must be moved to environment variable. |
| 🟡 Medium | ContactPage.jsx | Form has no onSubmit handler — clicking "Send Message" causes a full page reload. |
| 🟡 Medium | url-parser.js | Google Maps CID extracted using fragile hardcoded array indices — will break silently. |
| ⚪ Minor | HomePage.jsx | useMemo imported but never used — dead import. |
After I typed "fix these bugs", the agent updated 7 files, ran npm run build, caught a deprecated Vite API warning, and resolved it. Not a single copy-paste was needed on my end.
Step 4 — Alternative Provider: OpenRouter (Native VS Code Method)
NVIDIA NIM is fast and free, but its catalog is restricted. If you need Claude 3.5 Sonnet or Llama 3.3 70B, OpenRouter is the best alternative — and you can add it natively using the same Language Models settings panel.
Here is how to add OpenRouter natively — no extra extension required:
sk-or-v1-... key from openrouter.ai and confirm. OpenRouter models appear instantly in your picker.
Once saved, OpenRouter models — including free tiers like Llama 3.3 70B :free and Gemma 4 31B :free — appear in your model picker directly alongside your NVIDIA NIM models. You can switch between providers mid-session without leaving the chat window. For a full breakdown of how to combine multiple providers in one AI coding workflow, see my guide on building AI projects faster with a multi-provider setup.
Example 2 — Verify Your OpenRouter Key Before Adding It to VS Code
Before adding OpenRouter to the Language Models panel, run this quick verification script to confirm your key works and to see which free models are available to you. Save it as test_openrouter.py and run with python3 test_openrouter.py.
import requests

OPENROUTER_KEY = "sk-or-v1-YOUR_KEY_HERE"  # From openrouter.ai/keys
URL = "https://openrouter.ai/api/v1/chat/completions"
HEADERS = {
    "Authorization": f"Bearer {OPENROUTER_KEY}",
    "Content-Type": "application/json",
    "HTTP-Referer": "https://kishnaxai.in",   # Optional but recommended
}

# Test two models — one free, one paid
models_to_test = [
    ("meta-llama/llama-3.3-70b-instruct:free", "Llama 3.3 70B (Free tier)"),
    ("google/gemma-4-31b-it:free",              "Gemma 4 31B (Free tier)"),
]

prompt = "In one sentence: what is your model name?"

for model_id, label in models_to_test:
    print(f"\n=== {label} ===")
    payload = {
        "model": model_id,
        "messages": [{"role": "user", "content": prompt}],
        "max_tokens": 60
    }
    try:
        r = requests.post(URL, headers=HEADERS, json=payload, timeout=30)
        if r.status_code == 200:
            reply = r.json()["choices"][0]["message"]["content"]
            actual = r.json().get("model", "unknown")
            print(f"  Status       : 200 OK")
            print(f"  Reply        : {reply.strip()}")
            print(f"  Actual model : {actual}")
        else:
            print(f"  Error : {r.status_code} — {r.text[:200]}")
    except Exception as e:
        print(f"  Exception: {e}")
If both return 200 OK, your OpenRouter key is valid. Go back to VS Code, open the Language Models panel, click "+ Add Models", choose OpenRouter, and paste the same key. The models you tested here will appear immediately in your Copilot Chat dropdown.
NVIDIA NIM vs OpenRouter — My Honest Recommendation After Testing Both
I am not going to give you a safe "they both have pros and cons" answer. Here is the actual trade-off after running both for a week in my workspace.
NVIDIA NIM is the winner for speed and cost. Because NVIDIA hosts these models on their own hardware optimized specifically for inference, the latency is minimal. It feels like a local model. But it has two massive limitations:
- Severe Rate Limits: The free tier is capped tightly. If you run a recursive agent workspace scan that hits 15 files in 20 seconds, NIM will fail with a
429 rate limit error. I had to build custom retry delays in my code to stop the agent from crashing mid-run. - Limited Catalog: You only get models NVIDIA wants to host. No Claude 3.5 Sonnet, no custom community fine-tunes.
OpenRouter is what you use for reliability and variety. It is slower (usually 10-15 seconds for a response), but it gives you access to Claude, Gemini, Llama, and everything else in one place. If your enterprise workspace requires strict air-gapped data policies, NIM is a non-starter — you are sending your code to NVIDIA's cloud. In that case, use local Ollama instead, even if it runs slower on your laptop. If you want high-performance, rapid-fire completions for zero cost, stick to NVIDIA NIM.
| Factor | NVIDIA NIM | OpenRouter | Copilot Default |
|---|---|---|---|
| Best For | Fast coding, reasoning, 1M context | Broadest model selection | Out-of-the-box convenience |
| Speed | ⚡ Very fast (6s for DeepSeek) | Moderate (10-20s) | Fast (GPT-4o optimised) |
| Cost | Free developer tier credits | Pay-per-token (some free) | Included in Copilot plan |
| Top Models | DeepSeek V4 Flash, GPT-OSS 120B, Qwen 397B | Claude 3.5, Llama 3.3, Mistral | GPT-4o, Claude 3.5 |
| VS Code Integration | Native via NIM Provider extension | Via Continue extension | Native (built-in) |
| Agent / Tool Calling | ✅ Full support | ✅ Full support | ✅ Full support |
The Weird Bug I Found: Models That Lie About What They Are
I didn't expect this. GLM-5.2 insisted it was DeepSeek.
I had selected z-ai/glm-5.2 in the VS Code chat model dropdown, asked it what its parameter count was, and it replied: "My name is GitHub Copilot, and I am using the deepseek-v4-flash model."
This sent me down a rabbit hole. Was the provider extension routing my keys incorrectly? Had NVIDIA mismapped the model tags?
Neither. The model was simply lying. This happens for two reasons:
The takeaway: never trust an LLM to tell you what model it actually is. Always read the model field from the raw JSON response returned by the API server (see Example 3 below). That is set by the infrastructure, not the model's parametric memory.
Example 3 — Programmatic API Test to Confirm Model Identity
If you need to confirm which model is actually responding to your API calls (not just what it claims to be), read the model field from the raw API response, which NVIDIA NIM always populates correctly:
import requests
import json

NVIDIA_KEY = "nvapi-YOUR_KEY_HERE"
URL = "https://integrate.api.nvidia.com/v1/chat/completions"

payload = {
    "model": "deepseek-ai/deepseek-v4-flash",
    "messages": [{"role": "user", "content": "Hello"}],
    "max_tokens": 10
}

headers = {
    "Authorization": f"Bearer {NVIDIA_KEY}",
    "Content-Type": "application/json"
}

r = requests.post(URL, headers=headers, json=payload, timeout=30)
data = r.json()

# This field tells you the ACTUAL model serving the response
actual_model = data.get("model", "unknown")
response_text = data["choices"][0]["message"]["content"]

print(f"Claimed by AI : {response_text}")
print(f"Actual model  : {actual_model}")  # Always trust this, not the AI's text
The data["model"] field is set server-side by NVIDIA's infrastructure and cannot be overridden by the model's own output — making it a reliable source of truth for debugging.
Chat, Plan, Agent — Which Mode to Use for What
GitHub Copilot Chat in 2026 exposes three distinct operational modes through its interface. Understanding when to use each one will dramatically improve your productivity when using NVIDIA NIM models:
Chat Mode is the default. Use it for single-file, focused tasks. Highlight a function in your editor, open Copilot Chat, select deepseek-v4-flash, and ask it to refactor, document, or explain the highlighted block. DeepSeek V4 Flash is the best model for this mode — its 6-second response time makes interactive conversations feel natural rather than frustrating.
Plan Mode produces a structured, step-by-step TODO list for a complex feature before writing any code. This is where gpt-oss-120b excels. Ask it: "Plan the implementation of a dark mode toggle for this React app." Its chain-of-thought reasoning (which you can see as it "thinks for 9 seconds") produces detailed, well-sequenced plans that account for edge cases. This is the same kind of step-by-step thinking described in my article on the state of open-source AI models — the models driving Copilot today are the same open-weight releases that were benchmarked there.
Agent Mode (triggered via @agent or @workspace) is the most powerful and requires the least manual work. The agent autonomously reads your entire project, builds a context map, executes terminal commands, and edits multiple files in sequence — all from a single instruction. Use gpt-oss-120b for agent tasks that require deep multi-file reasoning, and deepseek-v4-flash when you need the agent to iterate quickly on smaller scoped changes.
Frequently Asked Questions
How do I use DeepSeek in GitHub Copilot VS Code?
The easiest way in 2026 is to install the NVIDIA NIM Provider extension from the VS Code Marketplace, add your free NVIDIA NIM API key via the Command Palette, and then select deepseek-v4-flash from the model picker inside GitHub Copilot Chat. This gives you full access to DeepSeek V4 Flash (671B parameters, 37B active per token) without paying for DeepSeek's own API separately.
DeepSeek vs GitHub Copilot — what is the difference?
GitHub Copilot is a VS Code product (the chat panel, inline suggestions, agent tools). DeepSeek V4 Flash is an AI model — the engine that powers those answers. They are not competitors; you can run DeepSeek inside Copilot. The difference matters for speed and cost: the default Copilot model (GPT-4o) is fast and well-tuned, while DeepSeek V4 Flash on NVIDIA NIM is equally fast (under 6 seconds) but costs nothing beyond your free NVIDIA credits.
Does DeepSeek V4 work in Copilot Chat?
Yes. After installing the NVIDIA NIM Provider extension and adding your nvapi- key, deepseek-v4-flash and deepseek-v4-pro both appear in the Copilot Chat model picker. They support Chat, Plan, and Agent modes — including the @workspace agent for full project scanning and multi-file editing.
How do I add a DeepSeek API key to VS Code?
Open the VS Code Command Palette (Cmd + Shift + P), search for NVIDIA NIM: Manage NVIDIA NIM API Key, and paste your key. If you want to use DeepSeek's own direct API (not via NVIDIA NIM), open the Language Models settings panel inside Copilot Chat, click "+ Add Models", and select DeepSeek as the provider — then paste your key from platform.deepseek.com.
Is NVIDIA NIM free to use?
Yes, for developers. Every account on build.nvidia.com receives a free credit balance that lets you run thousands of API calls across models like DeepSeek V4 Flash, GPT-OSS 120B, and Qwen 397B without entering any payment details. The free tier is generous enough for daily coding use.
Can I use GPT-OSS 120B in VS Code?
Yes. GPT-OSS 120B (the Apache 2.0 open-weight model released by OpenAI) is available in NVIDIA NIM's catalog under the model ID openai/gpt-oss-120b. After setting up the NVIDIA NIM Provider extension, search for gpt 120 in the Language Models panel and you will see it listed. It is best used for deep reasoning and planning tasks where response speed is less critical than accuracy.
How does DeepSeek V4 perform compared to default Copilot models?
For standard refactoring and syntax checks, DeepSeek V4 Flash matches or beats the default GPT-4o model, while responding in under 6 seconds. However, for multi-file workspace editing (Agent Mode), the default GPT-4o model remains more reliable because GitHub has optimized Copilot's internal agent prompt specifically for OpenAI's default API schema.
Can I use my DeepSeek API key directly without third-party extensions?
No. GitHub Copilot does not have a built-in "Generic OpenAI Endpoint" input box. To use custom models, you must use a proxy extension like the NVIDIA NIM Provider (for NVIDIA NIM models) or Continue (for direct DeepSeek/OpenRouter keys) which registers the models into VS Code's Language Models API.
Set It Up Today — It Takes 15 Minutes
If you are already paying for GitHub Copilot, there is almost no reason not to try DeepSeek or GPT-OSS through NVIDIA NIM. It costs nothing to experiment with, takes less than 15 minutes to configure, and gives you access to models that are genuinely excellent for coding and large-context reasoning.
The one thing I would tell you from my own testing: the model ID string must be exact. I wasted time early on because I typed deepseek-v4-flash instead of deepseek-ai/deepseek-v4-flash. That one prefix is the difference between a working setup and a cryptic 404 error. Check the NVIDIA catalog page for the exact string before you paste it anywhere.
Once it is working, you will wonder why you waited. The first time you type @agent find the bug in the project and watch it read 25 files and come back with a ranked bug report — that is the moment it clicks.
Today, my VS Code workspace switches between OpenAI, DeepSeek, GPT-OSS, and Llama without leaving the editor window. If you only make one upgrade to your AI coding workflow this year, make it this one.